Oh it does matter...
Simplest UV ever: Tools -> Snap, hit Y (the key), Ctrl+A
(or select all), right click and snap image. You may have to import an image for that (look under File).
Better UVs:
Same steps as above, except you are only going to select the ring and sphere. Also, enable advanced menus (Edit -> Prefs -> Advanced).
Once their UVs are projected from the top select on one of the cylinders. Right click on it (in object mode!), Auto-Smooth, Right click again, UV mapping, select one of the vertical edges and make a cut there (from the contex menu). At best one of the rear edges, this is where the UV is going to be split. Then right click again and select unfold, nothing else.
Now delete the other three unmapped cylinders. Next, in object mode, create a new cube. Now select your cylinder and create a copy of it (in the outliner, right click -> duplicate). Select that copy or the original - doesn't matter - in object mode, right click and right click again on rotate.
Now wings wants you to pick an edge, face, vertex or even object (midpoint) to rotate your selected geometry around. Enter face selection mode (f key), click on the top or bottom face of your cube and rotate your cylinder by 90°
(hold shift down or hit tab to enter manually). Repeat these steps for the other two.
Now that you are almost done select all objects, right click and combine. Right click again and hit UV map.
Good I forgot about one thing now, that's the cylinder caps which you don't need as they are inside of other objects.
In the UV editor switch to face mode, then also switch to face mode in the 3D view. Now band-select and delete the cylinder cap UV coordinates in the UV editor (eight overlapping ones). Hopefully they're still selected, top most status bar should say 8 faces.
To the right in the outliner is a _hole material. Drag it into the 3D view and assign it to the selection, then hit space (deselect). Almost done.
Last step is to do the UV layout, but that should be easy enough. Anyway, save now. Or better, try the incremental save function under file.
Select your combined object again, enter UV mapping (in object mode!) and try to rescale bits of it to make it use up the UV space. Right click and Create Texture and wings bakes you a rough UV layout. Close the UV mapper. In the outliner select your newly generated texture, right click, make external and save it somewhere (png = smallest filesize in this case).
One other useful thing is to use Select -> By -> UV mapped faces and then assign them a new material instead of using the "default" material. Drag your texture onto the new material in the outliner and assign it as diffuse map. You can delete the cube now you used as fake origin earlier, of course.
That should do it.
Oh yeah there can be mistakes, wrote it down out of the head.
edit:
Of course if you actually want to paint the sphere then a sphere map would be better. There'll be slight distortion, though. In the UV map preperation window, where you made the cuts, is a Sphere Projection option which should do that, after you marked one half edge loop as seam (cut). Same procedure as with the cylinder, basically.
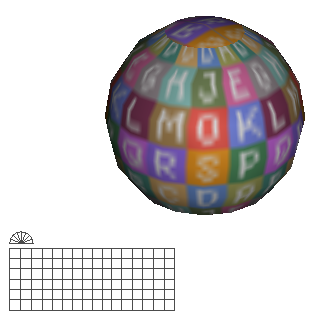
The pole caps won't be seperated or mirrored, though.


