rts specsds specs
Random WIP 2006-2011
Moderators: MR.D, Moderators

Re: Random WIP
so you're saying that 600 is too much for rts specs?....
Re: Random WIP
No, but you could go lower with small details like the rockets and distribute the polies elsewhere for example.

Re: Random WIP
hoi, it is better to save polies when you can and use them on other things. I don't care if machines can have 100s of 100k polies going at once these days. You don't have to virtually take a micrometer to the thing but dude save what you can where you can esp when it is easy to do. That way you will not find yourself wanting later.
Just because you can use more polies doesn't mean you should, using polies appropriately is part of being a good modeler.
Just because you can use more polies doesn't mean you should, using polies appropriately is part of being a good modeler.

Re: Random WIP

It's the fast attack bot such as Zipper but for another mod. Model must be very simple and have only spheres/cylinders, but I don't like these guns. I have some ideas about plasma cannon but the left arm needs a hand with fingers, I think, and all this will have a lot of polys.

Re: Random WIP
ITS MARVIN! :D
Hitchhiker's guide to the Galaxy manically depressed Combot, except evil looking :D

Hitchhiker's guide to the Galaxy manically depressed Combot, except evil looking :D
-
Warlord Zsinj
- Imperial Winter Developer
- Posts: 3742
- Joined: 24 Aug 2004, 08:59
Re: Random WIP
Might want to include some knees unless you're happy to have them goose-stepping all over the show...
Re: Random WIP
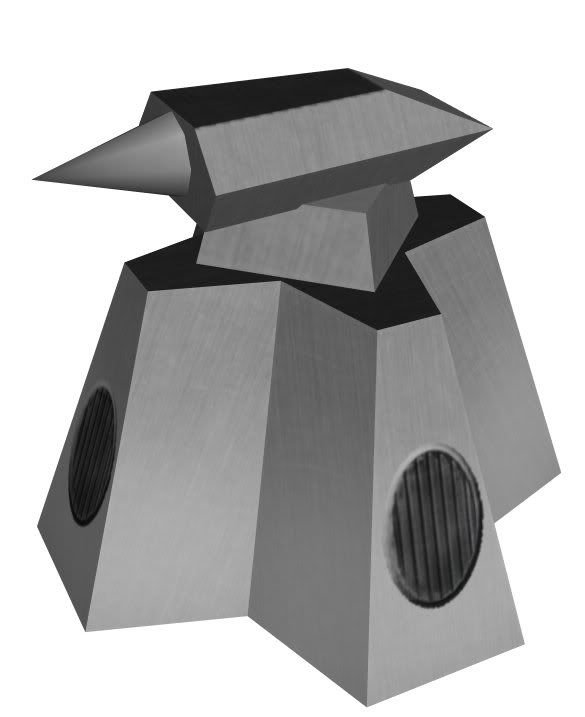
Is it made of solid irony?

Re: Random WIP
That looks like it has a TON of polies on the spheres and cylinders.MDV wrote:
It's the fast attack bot such as Zipper but for another mod. Model must be very simple and have only spheres/cylinders, but I don't like these guns. I have some ideas about plasma cannon but the left arm needs a hand with fingers, I think, and all this will have a lot of polys.

Re: Random WIP
TBH it looks like the OTA version with its textures removed.

Re: Random WIP
Hush. He's trying to use it to learn metal techniques.
Here are a couple of actually-useful things.
1. Re-align the facets, so that everything is straight up and down on your uvmap. Grab an edge with the line tool in Wings, select rotate-->chart to X/Y to get it lined up. If possible, you should always get the faces lined up. Sometimes, it's just not possible, so just line up one bit of it. The key is to have something lined up, so that you can very easily guestimate where "up" is, at all times.
I can see that you have the faces angled right now- you won't get very good results without a lot of un-necessary work.
2. If you have a funny bit that you've unrolled, and you're having trouble with distortion because it won't unroll just right, it's often handy to use the point-select tool, grab the points along the edge that's coming out distorted, and use Flatten X/Y to fix that edge. Be warned- this can cause some distortion, so you need to keep an eye on the texture, make sure it's not getting too badly stretched, and maybe move that set of points up / down / sideways to correct it enough that it won't be too obvious. There is no way to uvmap every object without any distortion, though, especially when you're dealing with a complex form that for whatever reason you're unwilling to cut up into facets... so don't stress about it too much. You just want to get it to a minimal level, while keeping the profile of the form close to the actual profile of the parts on the model, if you can. Depending on the area of the model, you may or may not be able to get away with a lot of distortion, it's really something that you just have to learn through experience.
3. I generally apply a "45-degree" rule for mechanical subjects. If the angle's greater than 45 degrees, I cut the uvmap there, unless the entire surface is supposed to be a continuous round object. It makes it harder to do a few things, but usually it saves a lot of time. For example, that "robocar" I did for World Builder (2 hours, modeling start to finish btw) is mirrored on both halves, and is cut up into a fairly large number of faces- a side, a top front and back, and a front piece.
I concealed it by using airbrush preshading to make it feel pretend-round. The final result pretty much looks like a single, continuous surface. This works well for painted stuff, because it's mainly paint-colored, or a gradient variant, and you can conceal the seams pretty easily. Doesn't work very well with really noisy surfaces, though, so be warned, this is not a "rule" that always applies.
4. Metal's very reflective, so you're going to see strong contrasts. Use preshading to heighten the feeling.
At any rate, that's my advice, feel free to ignore it
Re: Random WIP
These are first Mr.D's models (how I understood), but I like it:

Something in such style, maybe.
Something in such style, maybe.
Re: Random WIP
Agreed and I can't remember any nano turrets in OTAKDR_11k wrote:TBH it looks like the OTA version with its textures removed.

Re: Random WIP
Please, I like to be anal about things
-
Warlord Zsinj
- Imperial Winter Developer
- Posts: 3742
- Joined: 24 Aug 2004, 08:59
Re: Random WIP
so tempting to fixquote rattle 
Re: Random WIP
nothing to fix here, move along.rattle wrote:Please, I like anal
related news: