1. Your Model
The only major problem/hassle with using Ultimate Unwrap is that sometimes I find importing uv co-ordinates into Upspring from models made in UU sometimes fucks up and doesn't work. And I have never found out why. Infact, most of the time it doesn't. Anyway, there are two ways to go around this. Well, actually, only one. Ultimate Unwrap is a UV Mapping program but it has limited ability to move, rotate, stretch, and re-size objects, as well as delete them. So the first step will be what I do.
2. Gogogogo!
2.1
Alright, open up UU. Nothing to see here... just go and load your model. I like to use .obj because it seems to work very well with Upspring and everything. Other formats can sometimes fuck up or give errors or some of that shit. Sufficed to say, if you load your model and you see it there in UU, you've done something right. If you don't see any model, you've done something wrong. Try to export the model in another format.
Here's what you should be seeing after you've loaded a model (1):
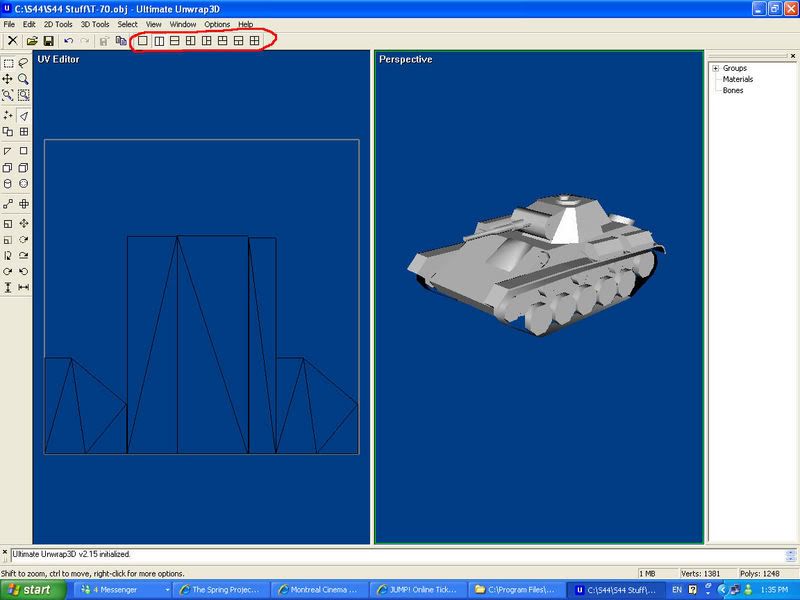
Circled in red are the little buttons to change views (I don't know why it's important...)
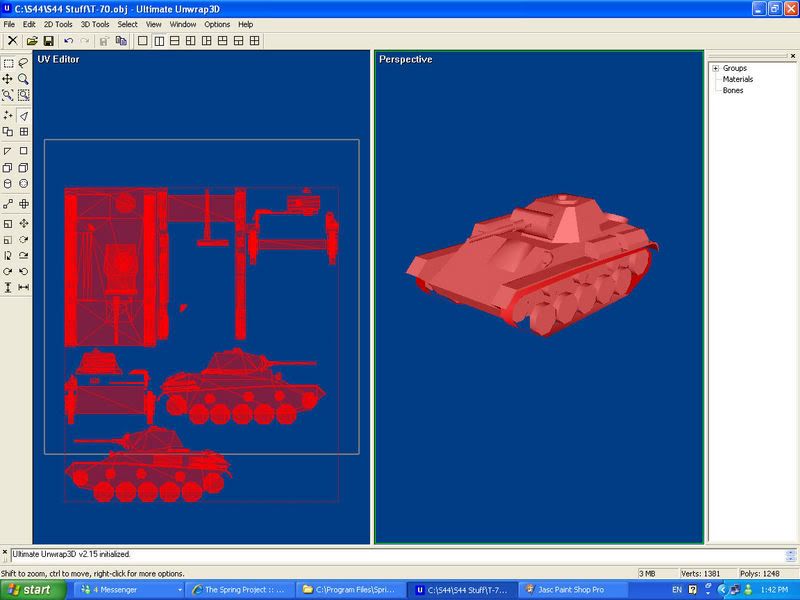
Now you may notice that on the left side, there are a bunch of very odd shapes (or maybe none at all). This is how your 3d modelling program "maps" your model for you -- retardedly. No worries tho. Click on "Select" in the menu bar and then "All". Your model, and any polys shown on the left side, should now turn red. You've selected all of your faces! (2)

2.2
Now that all faces are selected, go to the "2D Tools" in the menu. All you need worry about in this menu are the bottom 3 options: "UV Mapping >", "Unwrap Faces...", and "Unwrap Model...". For simplicity sake, click on "UV Mapping >" and then "Box" (3).

A little window should pop up asking how you'd like to scale your box. I usually choose "Scale to mapping space".
Now after clicking okay, the image in the left view window will change into a 4-sided view of your model's polygons.(4)
This may look a little retarded, and it is. All of your polies will be jumbled together, overlapping one another, and all sorts of madness. But, now that you've got all of your faces coherently appearing in the UV Editor window, you can do a little more selective tasks. For instance, I can select only some parts of the model and then go back to UV Mapping and do them seperately. Another useful tactic is choosing "Planar" instead of "Box", selecting one-sided from either x, y or z angles. This will make a single-view of all of your model. This can be helpful selecting specific pieces, such as the turret (5).

Now all that's left for you to do is spend a bit of time learning what exactly you need to do. Essentially, you need to create a 2D image in the UV Editor window which has all of your polys on a flat plane, that can then have an image superimposed on it, which will become a skin for your model. For instance, here is my recent Su-76(6):
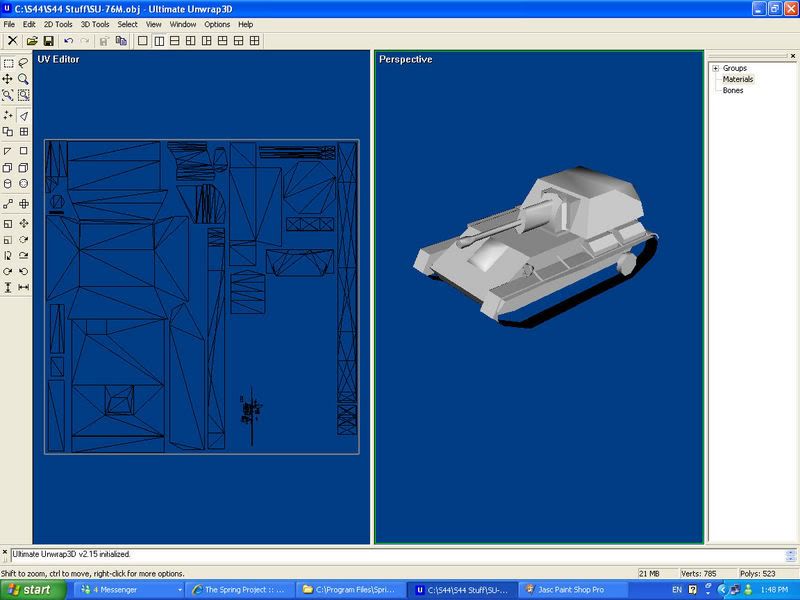
As you can see, all of its polys have been carefully arranged in the UV Editor window. Now what you need to do select File>Export...>UV Map (7).
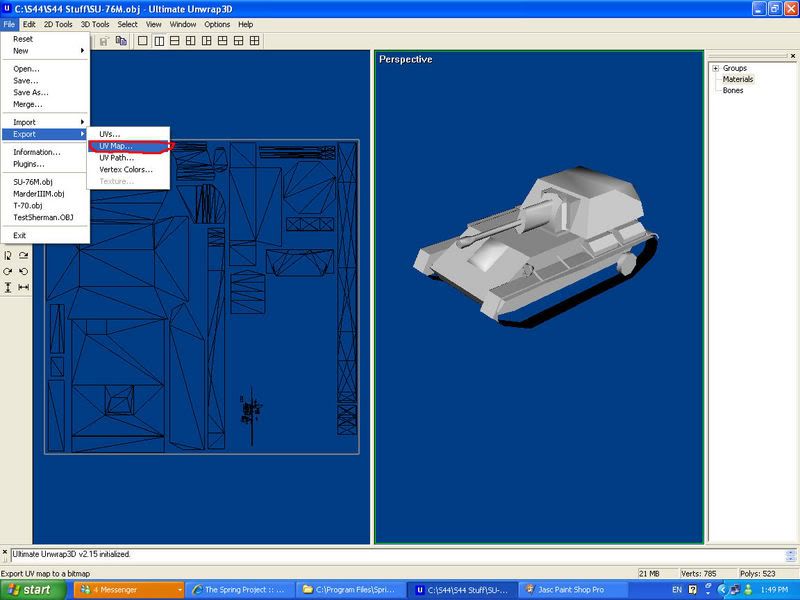
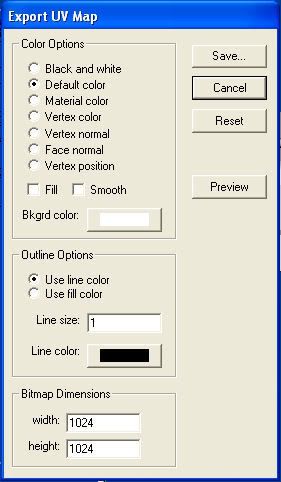
For simplicity's sake, in the window that pops up, just make sure it looks like this (8):
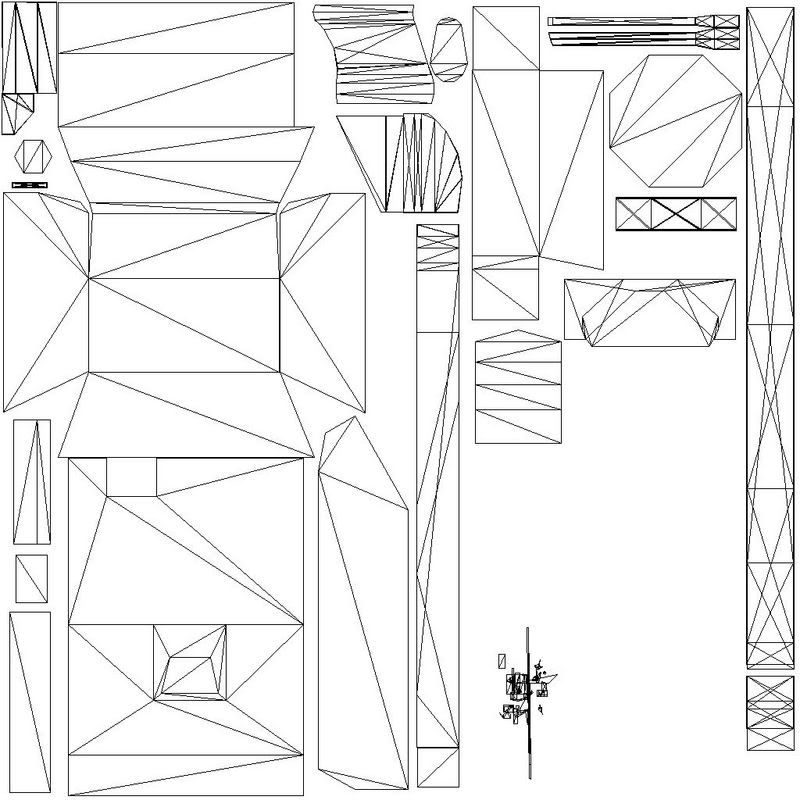
Save it as whatever the fuck you want. Then open it up in image editing. It'll look like this (9):
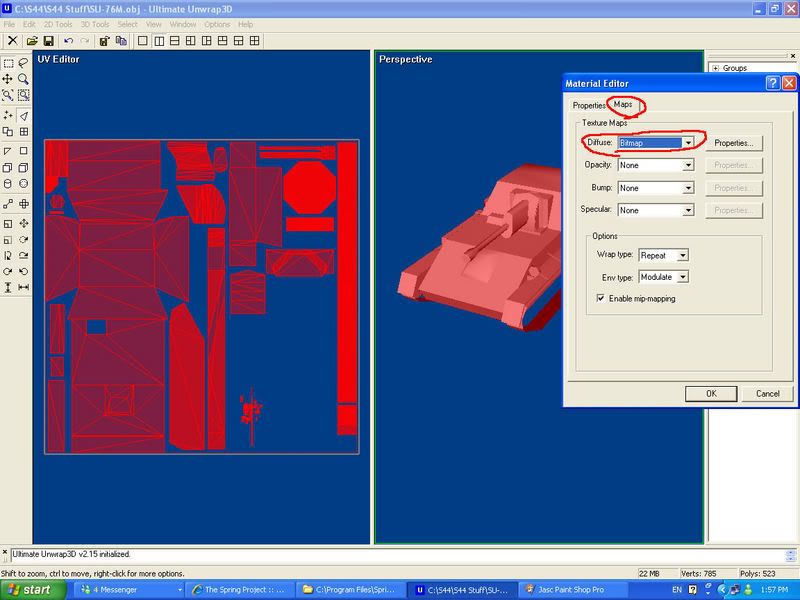
The next step is to go back to UU. Go to Select>All again to select the entire model. Then, on the right-hand side, in that little list that starts with [+] Groups, right-click on Material (important that you do this when all faces are selected!) and select Add... and a new item should pop up called "Untitled" (if there are already items underneath Materials, delete them all)(10):

Double click on this "Untitled" and a Material Editor window will pop up. Select the "Maps" tab. There will be a few different drop-down menus here. All you need to worry about is Diffuse. Set "Diffuse" to Bitmap, like this (11):
Once you've done that, select Properties next to it. This'll bring up a Diffuse Map Properties. Obviously there's no image to Reload or Clear, so click on "Change..." and then load the UV Map image that we exported earlier (or any UV Map image). Then hit OK, and OK again. I won't post a picture for this, because if you can't understand that then... well... you fail.
Now your model should have very visible black geometry lines allll over its ass. This is because we've loaded the skin, which has been placed on the model. And as the UV Map you exported was simply an outline of the model's geometry, well, this is what you get!
A handy trick, click on "Materials" in the right-hand list thing, and then immediately click back on "Untitled". This'll make your skin image appear in the UV Editor window. You really won't be able to see anything yet, but don't worry, it's there!
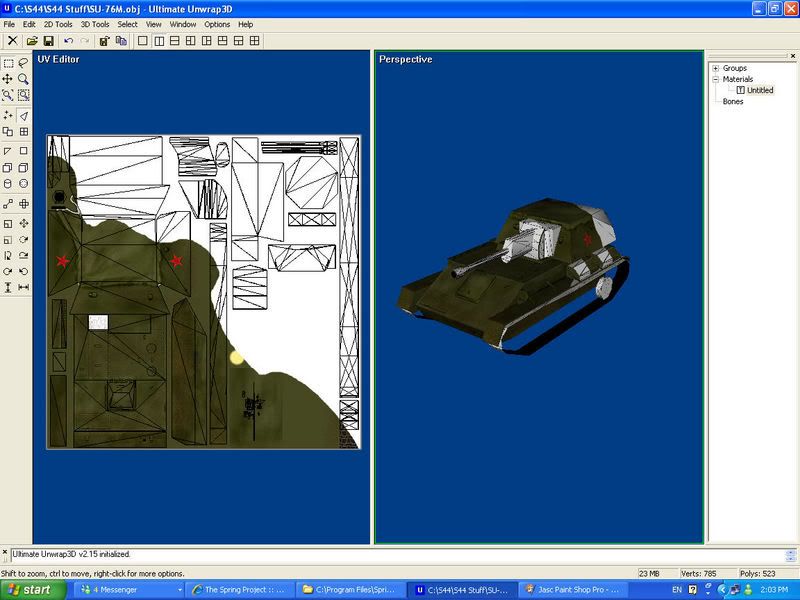
Now just start drawing in whatever graphics program you use, and make that skin image look nice. Saving it will automatically refresh it in UU, so it'll be updated there immediately. Heres a shot of a hald-skinned model (12):
The rest is up to you. I'm getting tired so I'm stopping now. Like I said earlier, you can select different polies and faces, and organize your model by deleting some parts and what-have-you, to export individual pieces to import into a proper heirarchy in Upspring. Figure it out.
PART THREE -- HOW TO MAKE TEXTURES THAT DON'T LOOK LIKE ASS.
A lot of people complain that their textures suck. And some people say that mine are good. God knows why. Anyway, I'm going to run together a quick tut on what I do to make textures.
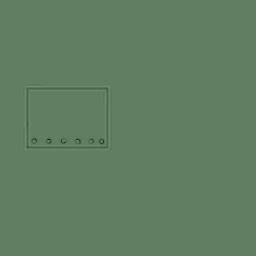
Let's start with a very simple flat green image. I use flat green as the base colour because most of the shit I do is green, or some stupid yellow/red combination. Here it is:

First thing's first, this needs some panel lines and/or bolts. Now I use PSP so I'll do it my way but I imagine this can be done with any program that has a lighten/darken feature. So I'll make a little panel by first making a square shape with darken, and then lightening around either side of it. This gives the appearance of being raised a bit. Don't make the lightening too bright or it'll look shit. Also, don't spend too much effort making it look perfect. Make it messy. it makes it look more real. Mess = real:

Now the next step is to make some bolts. Let's make a few by making small circular dark spots:

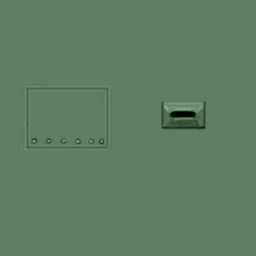
The next step is to take a regular ol paintbrush or airbrush or whatever, get that same green base colour, make it a bit smaller than the dark spot and fill out the middle:
Now take your lightener again and add a bit of extra lightness on the top of the bolt:

if you want, you can also darken the edges a bit more (which I did).
now you've made your basic panel line and bolts. Every bit of detail I do is using the darkening/lightening tool, from latches to lines to bolts to whatever. Here's a nice way to make a cool "vision port":

Yeah it's roundish but I'm not showing skill, just technique. That's all done by simply applying different, varying levels of lightening and darkening to create a 3d effect.
Now let's go back to our first image with the panel. It looks pretty silly and cartoonish as it is. We need to add some weathering! This is pretty simply. Take your image:
And get your lightening/darkening brush, make it fairly large, and just start randomly, erratically lightening and darkening all over the image. Completely arbitrarily. This is what I get:

You can also spend a bit of time darkening certain areas or whatever. Next step is to add dirt. Get your airbrush, set the opacity waaay down, the density down a bit, and then get a couple of browns and start splatting that on a tad:
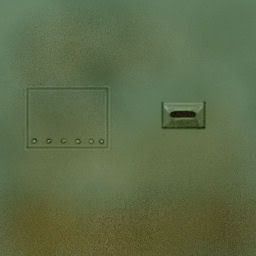
Let's assume the bottom part is lower to the ground, and that's where most of the dirt is concentrated. But there's also dirt everywhere.
Okay, that's done now. Next step is to soften the colours a bit, make them look less cartoonish. We do this by setting the saturation down. In PSP we do this by selecting Adjust>Hue and Saturation... in other things, I don't know. Figure it out. Here's what happens:
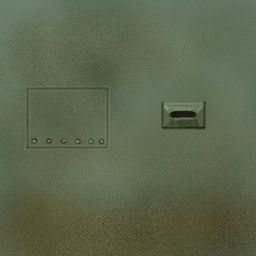
The last step I always do, which gives it that bit of extra realisticness, is to sharpen the image a bit. This brings out the hightlights more. it doesn't look like much when looking at the image, but when seeing it as a skin on an actual model it makes all the difference:

There you have it. Compare the first image (solid green) with the last. Big difference huh? Now, I learned all of this shit through trial-and-error. I usually hate tutorials because they're stupid most of the time, or are for something else. But this is fairly simple, right? Anyway, now go and make good textures, you bastahds.


