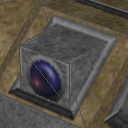
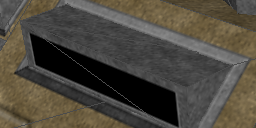
You should have a fairly advanced knowledge of Gimp/PS. You need to undo a lot, so be ready to undo a lot with the hotkeys, not with your mouse.
Start off by making a metal texture. I make mine by using filters -> Render -> Clouds at the default size, with maximum detail (15).

Afterwards, fill it in with the base color of your metal. I like a metal that is about medium, but it can always vary greatly. The bucket settings should have opacity (70%), Fill Whole Selection, and that is about all you should need.

Afterwards, use Noise -> Scatter RGB with correlated noise checked, independant RGB unchecked, and the RGB settings at .10. The higher they are, the more rough the metal is, 2 pics will be provided.
.10

.20

We'll use .10 (or, I will). Now, we are going to make this whole square the bumped up area, but it can be used for lots of different things, too.
Select pencil. Set opacity at .40 percent. Select "full/perfect" white. Alright, now this area gets kinda rough. Try to follow along as best you can. Now, zoom in to 800 percent or w/e you are comfortable pixel painting at (yes, single pixels). Now, the border should be at least 5 or 6 to be noticable, and even larger to make it stick out more. It shall be 8 pixels wide, to help demonstrate.
Alright, make a straight line somewheres in the middle, fairly far from the edges. REMEMBER TO UNDO YOUR FIRST PIXEL WHEN YOU GO TO MAKE THE LINE! (If using shift) IF NOT, IT WILL MAKE THAT PIXEL ABOUT 80% BRIGHTER INSTEAD OF 40!

Alright, see how it is barely visible? It will be more than enough visible when the whole side is accomodated to fit.
Alright, you can see the area that will be brightened. Actually, you don't, you see what you think is the area that will be brightened. Now, this part is hard to explain, I will highlight in red what you must color in now.

Now, do the same on the other side. You should end up with this.

Alright, now, color in the area BETWEEN the two diagonal lines.

Alright, now you can see the top. Before we do the sides, we do the bottom, at the same settings, except with full black. It isn't harder at all, just thinking upside down from the previous teachings.

Alright, now you can see the basics. Set opacity at 20 percent, and select white again. Color in the areas of the side using the tips of the trapezoids. Should be pretty easy, but it takes a while. It should end up like this.

Alright, now, the moderately confusing part. Select opacity at 40 percent again. You can keep white for now. Go over the edge where the "top" of the square is. Don't do the bottom where the black is, though. Only color in ONE pixel.

Now, after that, select black again, and do it along the bottom line of the square up top.

Finished yet? No
Now, go back to white, and do it along the diagonal edges at the top of the pic. Not the top of the square, but the diagonal edges that separate the 20% white from the 40%. Like this.

Alright, now do it with the black/40% combo on the bottom two.

Okay, and the last step, put the black at 30 percent opacity, and make a complete ring around the very edges of the pic. Yes, even go over the areas you just highlited, and, you are finished, congratulations, I have just imparted my best texturing knowledge into you...

Well, how does it feel, pretty damn nice, huh...
Thanks for listening, another thing you can do is making the model and texture work together, to increase the greatness of your texture.
Examples follow:


Edit: Also, another usage showing off a little conformity.

Edit2: The same greeble above from the UV map:

